Imagine you have two web servers on one Ubuntu machine. One of the applications uses Apache Tomcat and another - Nginx with PHP-FPM. You are going to have both of them secured with SSL certificate. For this purpose, you need to bind them to a single SSL port - 443. There are several options:
- Allocate each SSL port to dedicated IP
- Put your app behind Nginx and use SSL in front of your application
The easiest way to manage such a setup is to terminate SSL connection on the Nginx level.
Prerequisites
Let's check the installation and configuration process on the fresh DigitalOcean Ubuntu 22.04 machine. Also, I will not cover the installation of WordPress in this article. You should have at least two domains pointed to <your-server-ip>. In my case, I will use 'tomcat-lab.itsyndicate.org' and 'wp-lab.itsyndicate.org'.
Step 1: Install Nginx web server
First, you need to log in to your server via SSH with the command ssh root@<your-server-ip> and execute the following:
- Upgrade your server and package lists
apt-get update
apt-get dist-upgrade
- Install Nginx web server
apt-get install nginx-extras
Step 2: PHP-FPM installation
apt-get install php-fpm php-curl php-gd php-mbstring php-mcrypt php-xml php-xmlrpc php-mysql
Step 3: MySQL server installation
apt-get install mysql-server
Setup root password for MySQL:

Step 4: Install Apache Tomcat
The easiest way to download Tomcat is using apt-get:
apt-get install tomcat8
When the installation process is completed you can check that everything works by accessing http://<your-server-ip>:8080/ . You should see "It Works!" greeting.
Step 5: Configure Apache Tomcat to listen only localhost
For now for security reasons and in order not to duplicate content we should bind Tomcat to 127.0.0.1. Open "/etc/tomcat8/server.xml" with your favorite editor and change:
Connector port="8080" protocol="HTTP/1.1"
to:
Connector address="127.0.0.1" port="8080" protocol="HTTP/1.1"
For more information, you could check: https://tomcat.apache.org/tomcat-8.0-doc/config/http.html
When changes are made, restart your Tomcat:
service tomcat8 restart
Now we can check that it's listening on 127.0.0.1 with the following command:
netstat -nlp | grep java
tcp6 0 0 127.0.0.1:8080 :::* LISTEN 26917/java
Step 6: Configuring Nginx to serve Tomcat and WordPress
I'm using LetsEncrypt for both of my domains as it's a good solution to secure your app fast and easily.
WordPress site Nginx VHost config
I configured vhost '/etc/nginx/sites-enabled/wp-lab.itsyndicate.org' for WordPress site which is hosted on the same server with Tomcat in the following way:
upstream php {
 server unix:/run/php/php7.0-fpm.sock;
}
server {
 ## Your website name goes here.
 server_name wp-lab.itsyndicate.org;
 listen 443 ssl;
 ssl_certificate /etc/letsencrypt/live/wp-lab.itsyndicate.org/fullchain.pem;
 ssl_certificate_key /etc/letsencrypt/live/wp-lab.itsyndicate.org/privkey.pem;
 ssl_session_timeout 1d;
 ssl_session_cache shared:SSL:50m;
 ssl_session_tickets off;
# modern configuration. tweak to your needs.
 ssl_protocols TLSv1.2;
 ssl_ciphers 'ECDHE-ECDSA-AES256-GCM-SHA384:ECDHE-RSA-AES256-GCM-SHA384:ECDHE-ECDSA-CHACHA20-POLY1305:ECDHE-RSA-CHACHA20-POLY1305:ECDHE-ECDSA-AES128-GCM-SHA256:ECDHE-RSA-AES128-GCM-SHA256:ECDHE-ECDSA-AES256-SHA384:ECDHE-RSA-AES256-SHA384:ECDHE-ECDSA-AES128-SHA256:ECDHE-RSA-AES128-SHA256';
 ssl_prefer_server_ciphers on;
## Your only path reference.
 root /var/www/wp-lab.itsyndicate.org/public_html;
 ## This should be in your http block and if it is, it's not needed here.
 index index.php;
location = /favicon.ico {
 log_not_found off;
 access_log off;
 }
location = /robots.txt {
 allow all;
 log_not_found off;
 access_log off;
 }
location / {
 # This is cool because no php is touched for static content.
 # include the "?$args" part so non-default permalinks doesn't break when using query string
 try_files $uri $uri/ /index.php?$args;
 }
location ~ \.php$ {
 #NOTE: You should have "cgi.fix_pathinfo = 0;" in php.ini
 include fastcgi.conf;
 fastcgi_intercept_errors on;
 fastcgi_pass php;
 }
location ~* \.(js|css|png|jpg|jpeg|gif|ico)$ {
 expires max;
 log_not_found off;
 }
 location ~ /\.well-known/acme-challenge/ {
 allow all;
 root /var/www/letsencrypt;
 try_files $uri =404;
 break;
 }
}
Java Tomcat application Nginx VHost config
I configured vhost '/etc/nginx/sites-enabled/tomcat-lab.itsyndicate.org' for Tomcat application which is hosted on the same server with WordPress in the following way:
server {
 ## Your website name goes here.
 server_name tomcat-lab.itsyndicate.org;
 listen 443 ssl;
 ssl_certificate /etc/letsencrypt/live/tomcat-lab.itsyndicate.org/fullchain.pem;
 ssl_certificate_key /etc/letsencrypt/live/tomcat-lab.itsyndicate.org/privkey.pem;
 ssl_session_timeout 1d;
 ssl_session_cache shared:SSL:50m;
 ssl_session_tickets off;
# modern configuration. tweak to your needs.
 ssl_protocols TLSv1.2;
 ssl_ciphers 'ECDHE-ECDSA-AES256-GCM-SHA384:ECDHE-RSA-AES256-GCM-SHA384:ECDHE-ECDSA-CHACHA20-POLY1305:ECDHE-RSA-CHACHA20-POLY1305:ECDHE-ECDSA-AES128-GCM-SHA256:ECDHE-RSA-AES128-GCM-SHA256:ECDHE-ECDSA-AES256-SHA384:ECDHE-RSA-AES256-SHA384:ECDHE-ECDSA-AES128-SHA256:ECDHE-RSA-AES128-SHA256';
 ssl_prefer_server_ciphers on;
## Your only path reference.
 root /usr/share/tomcat8-root/default_root;
location / {
 proxy_set_header X-Forwarded-Host $host;
 proxy_set_header X-Forwarded-Server $host;
 proxy_set_header X-Forwarded-For $proxy_add_x_forwarded_for;
 proxy_pass http://127.0.0.1:8080/;
 }
location ~ /\.well-known/acme-challenge/ {
 allow all;
 root /var/www/letsencrypt;
 try_files $uri =404;
 break;
 }
}
Step 7: Test Tomcat and WordPress are secured and running simultaneously
After our modifications we should check Nginx config and restart web server:
nginx -t
nginx: the configuration file /etc/nginx/nginx.conf syntax is ok
nginx: configuration file /etc/nginx/nginx.conf test is successful
service nginx restart
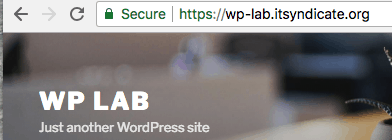
Checking WordPress installation:
Checking Tomcat installation:

Conclusion
Setting up Tomcat and WordPress on the same server is a pretty easy job. After reading my post you'll be able to secure your Java and PHP applications that are hosted on the same server. It takes around 30 minutes to get everything done from scratch. You should also consider that not all topics are cleared here, like Java application deployment and WP secure setup. I hope I have time to create a new post with this info for you.
Comments and critics are more than welcome!
Docker commands and Dockerfile usage for running containers on a local machine
Docker commands and Dockerfile usage for running containers on a local machine
Netflix tech stack for powering streaming backend and cloud solutions


